Saturday, April 30, 2011

It's Chiller Time!

I'll be heading to the Hilton Parsippany today for the Chiller Theater Expo, a toy, model, and film convention for horror. Looks like there are going to be a number of celebrities from the industry there, including Ernest Borgnine. I had mentioned to my buddy FrightGuy of Grimlock Manor that I really thought he was already dead!

Yet the expo is turning into a two-day affair for me. Originally I intended only going to the convention today to hang out with FrightGuy and meet up with my Hauntcast heartthrob Johnny Thunder, who is also going to be there. A scheduling conflict though only allows FrightGuy to go tomorrow, and since I wanted to go all stalker on JT --who also writes the very readable Johnny Thunder's Midnite Spook Frolic blog (yeah, put that on a t-shirt!) -- I figured I'd hit the expo both days.

If nothing else, I should be able to get a lot of pictures as a result.

I wonder if this expo is related to the old TV series of the same name? That six-fingered hand that used to come up and pick up the "chiller" letters always scared me. I'll post some pictures later on today.

Wednesday, April 27, 2011

A Thin Gruel

The First Skull
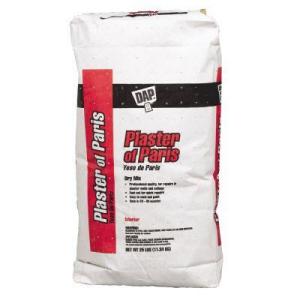
Having popped out my first latex mold I was excited to start spitting out skulls right away. A quick trip to Home Depot for a 25-lb. bag of DAP Plaster of Paris had me ready to pour (Note: Home Depot sells the bag for $11.48; Lowe's sells the exact same bag for over $22! The only difference is the Lowe's bag comes in a box too. I don't get it).

Back in the workshop I taped up the seam of the mold and mixed up a batch of plaster. The first pour went well and after an hour and a half a came back to do the second. This is where things started to fall apart. I mixed up the plaster but was completely unable to get the right consistency. Moreover, the plaster was on some sort of speed setting because it began to set up almost immediately. I tried to add more water but it just kept getting harder and harder until I finally had to abandon that batch altogether.

A third batch also seemed too thick with a 2:1 ratio of plaster to water so I added a little more -- almost 1:1 -- and it looked an appropriate thickness, though perhaps slightly on the thin side. When I poured the mix into the skull, one area from the first pour, about a dime size in diameter, flaked off though the rest remained intact. I completed the pour though and set it aside, quite frustrated actually. I would let it cure through the night.

Cracks in the foundation
This morning I went and check on it and it had set up nicely and I was able to demold the plaster skull. There were some obvious things that stood out though. First, the skull is exceptionally thin. As you can see in the picture it is a delicate piece of fine china. And because of that it cracked along the jaw in one area when I demolded it. It otherwise looked like it was supposed to.

In checking NoahFentz's tutorial again (as must be painfully obvious by now, I do first and read afterwards), I realized he said use two cups of plaster mix to one cup of water. Oooooooh! Well that partially explains the thinness of the pour. I did one cup of plaster with the two pours (I also realize now why you're just going to be getting just 14 skulls out of one bag).

Thin as a rail
The good thing about this project is you can jump right back into it and try again. This time I mixed up the plaster according to the directions and though feeling it was a little thick I proceeded to make the pour. Well it was too thick and made moving the mix around inside the skull a challenge, but it was infinitely better coverage inside the mold so on the next batch I whip up I'll try to make it just slightly thinner so that the batter (yes, I know, Noah says it should be a pancake batter-like consistency) can flow a little more easily.

I was worried initially that because the latex mold itself was somewhat on the thin side that it would flex and crack the pour as it was setting. That may in fact be what caused that piece to flake off. But had I used the proper amounts of mix to start with it ought not to be a concern in the future.

Regardless, this was a fun project and I can see that I will indeed end up with dozens and dozens of skulls as a result.

Monday, April 25, 2011

Good Mold, Like Bleu Cheese

Shhhh! Don't anyone tell NoahFentz, but I finished my latex skull mold. Well, just a final coat of latex later on today and it will be complete but for all intents and purposes, it's done. We can't tell him though because I promised to take my time doing this and it should have taken a few more days to complete. As it is, I did it in just two-plus days!

For those of you who haven't made a latex skull mold (or any latex mold for that matter), it's a process of layering latex and gauze over the item you want to replicate. In my case, a skull. Once it's demolded -- that is the latex is removed from the base -- I'll be able to make and remake out of plaster of Paris endless copies of the skull.

But it's important to let each layer of latex and gauze dry thoroughly before applying the next layer and NoahFentz made me promise to essentially apply just one layer a day, meaning it should have taken me a good four or five days to complete, not two. But impatient as I am I hurried up the process by having it dry in front of a small fan so that within several hours time each layer was dry and I could apply the next.

I've seen some attempts on YouTube where things were rushed and the results were not pretty. But it seemed that the problem with those failures was related to not apply enough layers as opposed to not letting it dry properly.

As explained in NoahFentz's tutorial, you first apply two thin layers of liquid latex to your prop and allow to dry thoroughly. You then apply another layer of latex, but add cotton gauze over it and then allow to dry. The next step is important though: apply a single layer of latex and let dry before continuing with a second layer of latex-and-gauze. You then apply another single layer of latex and then continue.

By doing it in such a way, you end up with approximately 10-12 layers of latex after the final single layer of latex is applied. Basically there are four layers of gauze in between all the latex layers. But you end up with a nice thick, durable mold that should last years and years and allow you to churn out endless replicas of whatever it is you're copying.

A 25-lb. bag of plaster of Paris should be able to produce 14 life-size skulls, so long as you mix it to a proper consistency and apply two coatings (I thought it was an odd number, but NoahFentz says that's what he's found a bag can produce). Since a bag goes for just over $11 at Home Depot, you can make reproduction skulls for about $1.30 a piece. That's pretty cheap.

I've got in mind covering my entire front steps with skulls, along with making catacomb walls. Of course it will take a little time to produce that many skulls (and I want to make a few candle-in-the-skulls too) so I don't want to get too ahead of myself. But it will be worth the time and effort.

And I'm just curious, but does anyone know how people began eating bleu cheese? I mean, that is mold after all. Can you imagine the conversation? "Mmmm! Cheese that's turned moldy. I want some of that!"


Update


Demolded mold
I demolded the skulled and was surprised it was a little thinner than I anticipated. It looks completely serviceable and should turn out skulls without problem, but I know NoahFentz's molds were much thicker. Undoubtedly I misunderstood his instructions since his tutorial does say 8 layers, but I would have sworn he verbally said four layers of gauze.


Looking inside mold
What I plan to do next is to make another mold, but this time without the lower jaw. That way I'll be able to get a variety of skull shapes. On that version, I'll go with additional layers of gauze and see if that makes for a thicker mold (which seems obvious). 

Sunday, April 24, 2011

A Mini Make-and-Take

Being as our local NJ/PA Make & Take group could not meet this month because of a series of misfortunes that occurred late in the month, NoahFentz and I got together again to hold our own little make and take session, working on props that might not have gotten done for awhile otherwise.

Noah has been steadily adding to his creepy family that inhabits appropriately enough his award-winning basement walk-thru haunt called "The Creepy House Next Door," alternatively known as Katzper's Haunt. I can't even come up with one name for my haunt and his has two! Guess that's why he wins awards.

His latest addition is Billie, which you can see if you check out his wighead tutorial in The Workshop section of his website. You'll actually see the entire creepy family there and don't forget to hit the link at the bottom for the family photo shoot (sans Billie). The one up above is perhaps one of my favorite groups shots of the family.

Like Pumpkinrot and some of the other great haunters and artists out there, NoahFentz's genius doesn't lay in the really cool props he builds (though you can't argue with the artistry of what they create), but rather it comes down to the photography of those props. Pumpkinrot's corpses are cool indeed, but photographing them at an abandoned factory or placing (and leaving!) one in a swamp just takes the concept of prop building to a whole other level.

I'd say NoahFentz's haunt has won awards not only because of the very cool basement haunt he has created (and is able to leave up all year 'round), but because his videos of the haunt are shot so well.

But Billie doesn't have a body yet, so Noah's goal was to start creating the PVC form to do that.

My goal was to hijack Noah's time and focus on learning how to do a latex skull mold (disregarding the fact that The Workshop has a complete step-by-step tutorial on doing this). I'm a hands-on kind of person and if I can see the process up close and personal I can usually internalize the whole thing and replicate it myself later on.

With the 2011 Home Haunter DVD Collection playing in the background (I am so getting me a set this week!), I monopolized Noah's time to showing me how to first prepare the base skull for the latex processing then applying the latex itself. It was actually very quick, so we probably spent more time again talking about haunters and Halloween than working, but that's a great time anyway.

This morning though I applied the first layer of gauze over the two layers of latex I applied yesterday and it's only just starting to look like the molds Noah has at his house. So after a combination of another 7-8 layers of latex and gauze I should be able to start casting my own plaster of paris skulls and using them for my haunt.

Saturday, April 23, 2011

The Holy Zombie

"For I delivered unto you first of all that which I also received, how that Christ died for our sins according to the Scriptures, and that he was buried, and that he rose again the third day according to the Scriptures, and that he was seen of Cephas, then of the twelve." (1 Corinthians 15:1-5)

While the resurrection of Jesus is the most famous reanimation that occurs in the Bible, there are eight specific instances of the dead being brought back to life that occur in the Scriptures. Some, like Lazarus, are brought about by Jesus's hand, but others earlier on in the Old Testament occur because God wills it. Afterwards, even his disciples bring the dead back to life.

Moreover, it can be argued that Jesus's resurrection was not the singular occurrence it's been portrayed, but was really part of the first mass zombie outbreak.

The first reanimation of a corpse occurs in the Book of Kings with Elijah and the widow's son:

"And he cried unto the Lord, and said, O Lord my God, hast thou also brought evil upon the widow with whom I sojourn, by slaying her son? And he stretch himself upon the child three times, and cried unto the Lord, and said, O Lord my God, I pray thee, let this child's soul come into him again. And the Lord heard the voice of Elijah; and the soul of the child came into him again, and he revived." (1 Kings 17:20-22)

The other seven instances are as follows:

  • Elisha and the son of the Shunammite woman (2 Kings 4:34-37) -- which could also be a pretty good description of necrophilia too
  • The dead man that touched the bones of Elisha (2 Kings 13:21)
  • The widow of Nain's son (Luke 7:12-15)
  • The synagogue leader's daughter (Luke 8:51-55)
  • Lazarus (John 11:38-44)
  • Tabitha, also called Dorcas (Acts 9:37-41)
  • Eutychus (Acts 20:9-12)

Resurrection of Lazarus
However, the first great zombie outbreak occurs when Jesus was nailed to the cross and died.

"And, behold, the veil of the temple was rent in twain from the top to the bottom; and the earth did quake, and the rocks rent; and the graves were opened; and many bodies of the saints which slept arose; and came out of the graves after his resurrection, and went into the holy city, and appeared unto many." (Matthew 27:51-53)

So as you sit down to your Easter dinner tomorrow, reflect upon how what is being celebrated is a time when the dead arose and walked the earth. The reanimation of corpses is an event that occurred numerous times throughout the Bible, whether it was done by the hand of God, Jesus, or one of his disciples. Yet it was the death of Jesus that coincided with the first reported zombie epidemic.

Happy Easter!

Thursday, April 21, 2011

Gravedigger's Head Complete!

I pushed on like a good haunter should and finished up the head of Madog. Oh, I may go back and add some additional small details, maybe a little more hair here and there, but in the main he is done. Now on to the body!

Before adding the hair, I added some facial details. I gave his cheeks some spider veins and some freckles/age spots. Then in the areas I wanted deeper shadows, such as around his eyes and in the crags of his jowls I used a slightly watered down brown paint. I then watered it down some more to hide the edges so he didn't look like a linebacker with dark streaks under his eyes.

Then I went a used a barely watered down brown wash and covered the entire head with it, using an old sheet to wipe off the excess. That's what you see above.

Next it was time to add hair. Using the braid I bought, I cut off small snippets of it, about a half-inch in length and used contact cement to glue them to the brows.


My goal had been to use an electric razor to shave them down so they weren't so bushy, but before that I wanted to blow off the excess hairs. I turned on my heat gun and blew them off, but in the process I also melted the hair. Girls, if you're buying your extensions at the dollar store, be careful! I didn't have to apply much heat at all to have them melt. Fortunately, I liked the effect.

Next I added sideburns, slowly overlapping each row to try and achieve full coverage.


I then used the heat gun to "trim" them.


I then did a similar process for the hair on his head, but left him balding on top since my yard display will be a 12th century monastery.


Once melted into shape he was essentially done. On the HauntForum discussion board, RoxyBlue made the comment that for an old guy with such black hair, he must be getting it out of a bottle! Good point! So I greyed the hair a little and this is what we have.


I'll probably work on my cemetery columns next before moving on to his body, but both might need to wait until I finish my basement laundry room.


Wednesday, April 20, 2011

Madog's the Dog!

I feel like I'm closing in on the completion of my gravedigger's head. Detailing still needs to be done -- coloring of the face, hair, eyebrows, sideburns -- but the head itself is completed. Below will be a longish set of pictures that updates the progress I've made to date, such as adding the eyes and painting.

When we left, Madog was pretty much looking like this:


I used two "sticky eyes" I got from Wal-Mart a couple of year's ago and set them into the sockets:


Using the cloth mache technique I learned from Dan Reeder (The Monster Man), I cut up four pieces of cotton sheet into small squares to form the upper and lower eyelids. Dipping them in my "pancake batter" mache paste I wrapped them around the eye. 

If you look at an eye, the upper lid tends to overlap the lower lid at the corners so start with the lower lid first. Despite the fact that the picture below shows my placing the upper lid first, I subsequently removed it and put the lower lid in first. You can see the overlap in the subsequent pictures.


They were then covered with Monster Mud and allowed to dry.


To begin the painting process, I first covered the head with a protective layer of spar varnish. Interestingly, it makes the Monster Mud feel like clay. Once it was dry, though, I covered it with a layer of primer.


Below is a completely unnecessary dark base coat I applied. I'm not quite sure where I was going with this, probably thinking of dry brushing or something, but I guess it provides another layer of protection for the mache and clay beneath.


I then applied three coats of a flesh tone paint.


The next step will be adding hair. I went to my local dollar store and picked up this "jumbo" braid (for $1.29!) which I'll use to add the various hair features. But first I'll need to add some further details to the flesh with paint.


Then it's just a matter of constructing the body. Well, if that's all there is.

Friday, April 15, 2011

A Plethora of Updates

From projects to passings there are a number of things that have been going on the passed few days.

I learned yesterday that a blogger I've enjoyed and have learned much from passed away the other day after suffering two heart attacks several weeks prior. John Jones, who was better known as Jonty on the Internet and wrote the blog Darkside Creations, had a number of ailments that afflicted him apparently most of his life, but several weeks ago while sitting watching TV suffered a heart attack. Initially passing it off as a panic attack, he suffered a more massive one a short time later. He was on the mend at home after undergoing an angioplasty, when he apparently died.

I only had some perfunctory contact with Jonty over the past year and we exchanged a few emails from time to time, but he was a very giving blogger. Along with Stolloween, Spooky Blue, Dan Reeder, and of course Pumpkinrot, Jonty was one of the influential paper mache artists that I tried to steal plenty of ideas and techniques from. You may even recall my post on the "Jonty Joint." I'll miss his his Troll Screamer creations.

I've also been working on my various props, the gravedigger head and my cemetery pillars. Both are coming along and Madog's head is almost ready for painting now that I've sanded it smooth, attached the ears, and applied a very thin third layer of Monster Mud. Once it dries completely, I'll give it a light sanding to knock down any marks. I just need to make the eyes and we'll be good to paint.


I filled the neck with Great Stuff to hold the PVC pipe in place


I then sanded the head smooth


The ears were attached an a final coat of MM was applied

For the pillars, I've got the framework built and will be ready to attach the rigid foam insulation sides. I had bought 1x3's to do my basement work, but ultimately decided 2x4's and x6's will be necessary to hide pipes and ductwork. It won't be so simple as throwing up some furring strips and insulation panels, I'll actually need to build bump outs, so rather than returning the wood to Lowe's I used it for the pillars.

I was actually surprised by how many it required; I ended up using 12 of them to complete the frame. A few 2x4's left over from previous projects were screwed to the base to give a solid footing to stand on (and hopefully resist blowing over).


A back frame was built similar to the front with a brace attached to keep it from racking.


The front and back were attached with cross pieces and another brace was attached to one side to keep it from racking in that direction.


The 2x4's were mitered and attached to the bottom of the frame. Any gaps there might be will be filled in at the end with Monster Mud.


The two pillars waiting for some skin.

I'm still deciding on certain details for the pillars that I'll need to make a final decision on before I skin them. For example, the lamps will be mounted on the wood panels, so I'll need to drill holes for the wiring, but I may want to include foggers in the future so I might block out a space on the frame to mount a gargoyle head, for example, that will spew the fog. I'll probably want to block out an area for an access panel too to make it easier to reach inside without having to pick up and move the pillar. 

Also, I'm thinking of a different cemetery fence for the yard and may want to attach it to the sides of the pillars. So many plans, so little time! Less than 200 days to Halloween!


Wednesday, April 13, 2011

Photo*@$%it!

Anyone else having issues with PhotoBucket? As is apparent from my site's background image (or lack thereof), the photo hosting site is down, despite a message there saying it would be fixed by 11 p.m. April 12.

Monday, April 11, 2011

An Unearthly Pairing

Saturday Nightmares will be hosting a Horror & Sci-Fi Expo on June 3-5 at the Sheraton Meadowlands Hotel in East Rutherford, NJ.

Usually I'm loathe to drive any appreciable distance to attend one of these types of functions, but as this one is really just 10 minutes or so from my house I'd be remiss in not showing up and seeing what they have to offer. The lineup seems interesting enough.

They'll be screening movies and the (better) Rod Serling version of The Twilight Zone will be playing all weekend long. Some of horror's luminaries will be there with Tippi Hendren appearing at "The Birds" screening and Sid Haig will be around for "House of 1000 Corpses." I have to admit that was some inspired casting by Rob Zombie. While I was less than impressed with his "Halloween" reimaginings, his white, trailer park trash slasher flicks are immensely entertaining. Haig's Captain Spaulding is an enduring character.

There are quite of few characters that will be in attendance, unfortunately Megan Fox doesn't appear to be one of them, more's the shame ("Jennifer's Body" was genius, I tell ya). Lisa Marie will be there so I guess that's consolation. "Hellraisers" Doug Bradley (Pinhead) is scheduled to be there too, though he doesn't interest me in the way Megan Fox would.

On Friday vendors will be available when the doors open at 5:00 p.m., along with the opportunity for celebrity autographs, while on Saturday there will be the New Jersey Zombie Walk during the day and a masquerade ball at night with a costume contest. Sunday is similar to Friday, though it ends at 2:30 p.m. Panel discussions will be held throughout the weekend.

It's a three-day affair, with tickets going for $20 per day. What I don't get is why there's no discount for a full weekend pass (it's $60 for all three days) and that there's no benefit to ordering tickets early (they're $60 too). Unless I missed the fine print somewhere, smarter marketing would have offered some sort of discount for either ordering early or taking a 3-day pass. As it is, I'll try to choose a date that seems best. Saturday I imagine will be the busiest day, but Sid Haig will be there.

It's no Transworld or HAuNTcon, but for a first time show attendee it should be fun. Wanna go? Hit me up and we can make it a group trip! First round's on me.

Sunday, April 10, 2011

Madog Update

I've continued working on my gravedigger prop, Madog of the Dead, and for my first attempt at this I'm pleased with how it's turning out. After covering the entire mache head with the paper clay and allowing it to dry, I wasn't particularly keen on the lumpiness of it. As I mentioned previously, creating a smoother mix to start with will help it out, but I've found that after applying the current clay, if I brush water over it and tap it with my fingers I can smooth out a lot of the lumps.

When the paper clay dries, it is very hard (and heavy!) and though it's possible to sand, it's not the easiest to do so, and I didn't want to create a dust storm with a Dremel. So I figured I could create a smoother texture by applying a layer of Monster Mud to it. The first layer did do just that, but a second one refined it some more. I'm still debating whether to apply a third one (all of them are relatively thin), but I'm thinking I'll sand it down lightly after the second layer dries and see how that looks (so much for not creating a lot of dust). I'm guessing it will be sufficient, though. I also figure it provides a layer of protection to the paper clay underneath, though it will eventually receive a waterproofing coat at the end.

Here are some progress update pictures.


Fully covered in paper clay


With one coat of Monster Mud


And after a second coat

I didn't worry so much about the neck since a lot of it will hidden in the folds of his clothes, and a "turkey neck" looks appropriate on an old geezer who's spent a lifetime digging graves. After he's sanded (hopefully) smooth, I'll work on the eyes and ears.


Related Posts with Thumbnails
 
/* Use this with templates/template-twocol.html */