Showing posts with label Skulls. Show all posts

Monday, September 19, 2011

No Skeletons In The Closet

Or at Walgreen. Like any good haunter would, I stopped at the local Walgreen on my way home from the hospital yesterday to check if they had any skeletons in stock. Okay, I had to put my prescription in at the pharmacy too, but I figured I'd kill two birds with one stone.

The manager gave me some hope when he offered to go in the back and look, but alas and alack! no skeletons were found. He did helpfully add that his next shipment was coming in on Tuesday and he thought they'd be on that truck.

I hit two other pharmacies in the area, also with no luck. Both said they had come in yet, which was hopeful, because it means they haven't run out of stock yet. So I still might be able to round up some yet.

The offerings were actually pretty meager at two of the three stores. The third one, a larger Walgreen in Paterson (the site of all that awesome flooding after Hurricane Irene, and "awesome" being used in the correct sense of inciting awe in someone) actually had quite a lot of props on their shelves. I picked up the two resin skulls for $6 each, which I thought was a good price for the detail and durability they showed. My wife also wanted a scene-setter so we got one of those too (and she picked up two small witch dolls today while out; boy, she sure does like her Halloween "cute").

I'll also say I was in a Wal-Mart today and I thought its Halloween section was pretty dismal. It had a bunch of costumes, row upon row of candy, a few foam tombstones, but not much more. Sure it had a couple of foggers out (and one nice skull fogger that I was tempted to pick up) but not much more. Truly slim pickin's. Maybe more will be coming in soon, like at Walgreen, but I recall there being a lot more last year.

Anyway, tomorrow I'll be heading back out to the local stores and seeing if the new shipment's arrived.

Wednesday, April 27, 2011

A Thin Gruel

The First Skull
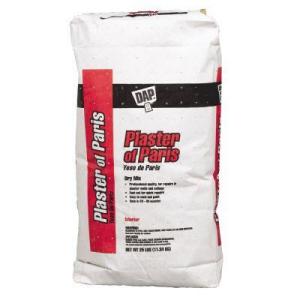
Having popped out my first latex mold I was excited to start spitting out skulls right away. A quick trip to Home Depot for a 25-lb. bag of DAP Plaster of Paris had me ready to pour (Note: Home Depot sells the bag for $11.48; Lowe's sells the exact same bag for over $22! The only difference is the Lowe's bag comes in a box too. I don't get it).

Back in the workshop I taped up the seam of the mold and mixed up a batch of plaster. The first pour went well and after an hour and a half a came back to do the second. This is where things started to fall apart. I mixed up the plaster but was completely unable to get the right consistency. Moreover, the plaster was on some sort of speed setting because it began to set up almost immediately. I tried to add more water but it just kept getting harder and harder until I finally had to abandon that batch altogether.

A third batch also seemed too thick with a 2:1 ratio of plaster to water so I added a little more -- almost 1:1 -- and it looked an appropriate thickness, though perhaps slightly on the thin side. When I poured the mix into the skull, one area from the first pour, about a dime size in diameter, flaked off though the rest remained intact. I completed the pour though and set it aside, quite frustrated actually. I would let it cure through the night.

Cracks in the foundation
This morning I went and check on it and it had set up nicely and I was able to demold the plaster skull. There were some obvious things that stood out though. First, the skull is exceptionally thin. As you can see in the picture it is a delicate piece of fine china. And because of that it cracked along the jaw in one area when I demolded it. It otherwise looked like it was supposed to.

In checking NoahFentz's tutorial again (as must be painfully obvious by now, I do first and read afterwards), I realized he said use two cups of plaster mix to one cup of water. Oooooooh! Well that partially explains the thinness of the pour. I did one cup of plaster with the two pours (I also realize now why you're just going to be getting just 14 skulls out of one bag).

Thin as a rail
The good thing about this project is you can jump right back into it and try again. This time I mixed up the plaster according to the directions and though feeling it was a little thick I proceeded to make the pour. Well it was too thick and made moving the mix around inside the skull a challenge, but it was infinitely better coverage inside the mold so on the next batch I whip up I'll try to make it just slightly thinner so that the batter (yes, I know, Noah says it should be a pancake batter-like consistency) can flow a little more easily.

I was worried initially that because the latex mold itself was somewhat on the thin side that it would flex and crack the pour as it was setting. That may in fact be what caused that piece to flake off. But had I used the proper amounts of mix to start with it ought not to be a concern in the future.

Regardless, this was a fun project and I can see that I will indeed end up with dozens and dozens of skulls as a result.

Monday, April 25, 2011

Good Mold, Like Bleu Cheese

Shhhh! Don't anyone tell NoahFentz, but I finished my latex skull mold. Well, just a final coat of latex later on today and it will be complete but for all intents and purposes, it's done. We can't tell him though because I promised to take my time doing this and it should have taken a few more days to complete. As it is, I did it in just two-plus days!

For those of you who haven't made a latex skull mold (or any latex mold for that matter), it's a process of layering latex and gauze over the item you want to replicate. In my case, a skull. Once it's demolded -- that is the latex is removed from the base -- I'll be able to make and remake out of plaster of Paris endless copies of the skull.

But it's important to let each layer of latex and gauze dry thoroughly before applying the next layer and NoahFentz made me promise to essentially apply just one layer a day, meaning it should have taken me a good four or five days to complete, not two. But impatient as I am I hurried up the process by having it dry in front of a small fan so that within several hours time each layer was dry and I could apply the next.

I've seen some attempts on YouTube where things were rushed and the results were not pretty. But it seemed that the problem with those failures was related to not apply enough layers as opposed to not letting it dry properly.

As explained in NoahFentz's tutorial, you first apply two thin layers of liquid latex to your prop and allow to dry thoroughly. You then apply another layer of latex, but add cotton gauze over it and then allow to dry. The next step is important though: apply a single layer of latex and let dry before continuing with a second layer of latex-and-gauze. You then apply another single layer of latex and then continue.

By doing it in such a way, you end up with approximately 10-12 layers of latex after the final single layer of latex is applied. Basically there are four layers of gauze in between all the latex layers. But you end up with a nice thick, durable mold that should last years and years and allow you to churn out endless replicas of whatever it is you're copying.

A 25-lb. bag of plaster of Paris should be able to produce 14 life-size skulls, so long as you mix it to a proper consistency and apply two coatings (I thought it was an odd number, but NoahFentz says that's what he's found a bag can produce). Since a bag goes for just over $11 at Home Depot, you can make reproduction skulls for about $1.30 a piece. That's pretty cheap.

I've got in mind covering my entire front steps with skulls, along with making catacomb walls. Of course it will take a little time to produce that many skulls (and I want to make a few candle-in-the-skulls too) so I don't want to get too ahead of myself. But it will be worth the time and effort.

And I'm just curious, but does anyone know how people began eating bleu cheese? I mean, that is mold after all. Can you imagine the conversation? "Mmmm! Cheese that's turned moldy. I want some of that!"


Update


Demolded mold
I demolded the skulled and was surprised it was a little thinner than I anticipated. It looks completely serviceable and should turn out skulls without problem, but I know NoahFentz's molds were much thicker. Undoubtedly I misunderstood his instructions since his tutorial does say 8 layers, but I would have sworn he verbally said four layers of gauze.


Looking inside mold
What I plan to do next is to make another mold, but this time without the lower jaw. That way I'll be able to get a variety of skull shapes. On that version, I'll go with additional layers of gauze and see if that makes for a thicker mold (which seems obvious). 

Sunday, April 24, 2011

A Mini Make-and-Take

Being as our local NJ/PA Make & Take group could not meet this month because of a series of misfortunes that occurred late in the month, NoahFentz and I got together again to hold our own little make and take session, working on props that might not have gotten done for awhile otherwise.

Noah has been steadily adding to his creepy family that inhabits appropriately enough his award-winning basement walk-thru haunt called "The Creepy House Next Door," alternatively known as Katzper's Haunt. I can't even come up with one name for my haunt and his has two! Guess that's why he wins awards.

His latest addition is Billie, which you can see if you check out his wighead tutorial in The Workshop section of his website. You'll actually see the entire creepy family there and don't forget to hit the link at the bottom for the family photo shoot (sans Billie). The one up above is perhaps one of my favorite groups shots of the family.

Like Pumpkinrot and some of the other great haunters and artists out there, NoahFentz's genius doesn't lay in the really cool props he builds (though you can't argue with the artistry of what they create), but rather it comes down to the photography of those props. Pumpkinrot's corpses are cool indeed, but photographing them at an abandoned factory or placing (and leaving!) one in a swamp just takes the concept of prop building to a whole other level.

I'd say NoahFentz's haunt has won awards not only because of the very cool basement haunt he has created (and is able to leave up all year 'round), but because his videos of the haunt are shot so well.

But Billie doesn't have a body yet, so Noah's goal was to start creating the PVC form to do that.

My goal was to hijack Noah's time and focus on learning how to do a latex skull mold (disregarding the fact that The Workshop has a complete step-by-step tutorial on doing this). I'm a hands-on kind of person and if I can see the process up close and personal I can usually internalize the whole thing and replicate it myself later on.

With the 2011 Home Haunter DVD Collection playing in the background (I am so getting me a set this week!), I monopolized Noah's time to showing me how to first prepare the base skull for the latex processing then applying the latex itself. It was actually very quick, so we probably spent more time again talking about haunters and Halloween than working, but that's a great time anyway.

This morning though I applied the first layer of gauze over the two layers of latex I applied yesterday and it's only just starting to look like the molds Noah has at his house. So after a combination of another 7-8 layers of latex and gauze I should be able to start casting my own plaster of paris skulls and using them for my haunt.

Saturday, March 12, 2011

A Bad Day Haunting...

...or just talking and thinking about haunting, is better than a good day at work. And today wasn't bad at all. In fact, it was a very good day, spent talking and thinking about haunts and Halloween.

Got to hang out with my buddy Noah Fentz who operates the award-winning home haunt The Creepy House Next Door and have our own mini make-and-take. We actually worked in The Creepy House, well upstairs from the haunt, anyway.

While I was corpsing my groundbreaker, Noah worked on a wig head he's putting together for a step-by-step tutorial. I don't think I'm telling stories out of school by mentioning it since he does have on his site a section devoted to it, only that it says the tutorial is coming soon. And it is. I was there. He's working on it!

I also got to pour my first plaster of Paris skull casting. Actually, Noah showed me how to do it using one of his latex molds. He did the first half of the pour, I did the second, and then he showed me how to separate the mold from the cast. Very cool. That is now my next goal, to make my own latex mold so I can cast skulls regularly. The result is the picture above. Once it firmly sets in a few days, I'll sand it and paint it for use this Halloween.

A fun lunch, excellent discussion about haunting and the haunters we know, and an all around good day hanging out with good people. Here's to more days like this.

Saturday, February 13, 2010

Mass Effect


I recently came across a blog called Darkside Creations where blogger Jonty creates some terrifically imaginative papier mache projects. He's also wonderfully giving by sharing a lot of the methods he uses and his projects and tutorials are particularly helpful for the frugal haunter (and artist) in all of us (make that me).

One tutorial in particular is going to help me with the fireplace surround I previously mentioned I was going to build for Halloween. Because of the large number of skulls I'm going to need for the surround, his replication method will allow me to churn out far more than I was going to be able to before.

Using aluminum foil and masking tape, Jonty is able to churn out large numbers of skulls in a short amount of time. Since he'll be adding greater detail to the skull face later, his method gives you the basic shape in a short amount of time. Part 2 can be seen here. He also recommends using a simple balloon to fill out the rest of the skull face.

I think I might be able to take this one step further though by combining Jonty's skull face replication method with Stolloween's new cardboard skull armature.

The great Stolloween posted a new method of creating his distinctive skulls that's also relatively fast and inexpensive (he says the expressive masks cost all of about $0.50 to make). His facial details are his alone and I don't recommend copying them (no matter how cool they are), but the use of simple cardboard strips to define the back of the skull does make the process of building the rest of the skull a simple matter.

Thus, using Jonty's facial replication method with Stolloween's cardboard armature structure seems like it will give me a very fast and economical (er, cheap) means of making the large number of skulls I'll need.

Ball-and-Socket
I'd also like to mention a youtube video Jonty posted for making a quick and easy ball-and socket joint. The beauty of this simple joint means that it just might be possible to pose skeletons in any number of positions. You'll be able to use the same prop in different scenes year after year.


There might be some issues with keeping the integrity of the joint intact if it's used outside in the elements, but I would think with proper sealants and coatings it should last just as long as the rest of the prop. Certainly it's worth trying and I'll be using it in the hanging corpses I have planned for my new side yard haunt.

That's the one thing I've found out about the haunt community is that everyone is quite willing to freely share their knowledge with others. Giving back seems like a great way to repay their efforts.

Rich
Related Posts with Thumbnails
 
/* Use this with templates/template-twocol.html */